
Control and signalling
-
400 VRated voltage
-
250 VRated voltage
-
48 VRated voltage
-
240 VRated voltage
-
11-17 AOverload release current setting
-
14-22 AOverload release current setting
-
18-26 AOverload release current setting
-
22-32 AOverload release current setting
-
6-10 AOverload release current setting
-
9-13 AOverload release current setting
-
0.1-0.16 AOverload release current setting
-
0.16-0.25 AOverload release current setting
-
0.25-0.4 AOverload release current setting
-
0.4-0.63 AOverload release current setting
-
0.63-1 AOverload release current setting
-
1-1.6 AOverload release current setting
-
1.6-2.5 AOverload release current setting
-
2.5-4 AOverload release current setting
-
4-6 AOverload release current setting
-
5-8 AOverload release current setting
-
28-40 AOverload release current setting
-
34-50 AOverload release current setting
-
45-63 AOverload release current setting
-
500 VRated voltage
-
24 VRated voltage
-
110 VRated voltage
-
230 VRated voltage
-
80-100 AOverload release current setting
-
55-75 AOverload release current setting
-
70-90 AOverload release current setting
-
0Number of contacts as normally open contact
-
2Number of contacts as normally open contact
-
1Number of contacts as normally open contact
-
25 ARated operation current
-
4Number of contacts as normally open contact
-
63 ARated operation current
-
40 ARated operation current
-
16 ARated operation current
-
3Number of contacts as normally open contact
-
0Number of contacts as normally closed contact
-
1Number of contacts as normally closed contact
-
2Number of contacts as normally closed contact
-
4Number of contacts as normally closed contact
-
ThermomagneticSwitch off technique
-
MagneticSwitch off technique
-
220-690 VRated operating voltage
-
690-690 VRated operating voltage
-
250-250 VRated operating voltage
-
400-400 VRated operating voltage
-
500-500 VRated operating voltage
-
63 ARated permanent current Iu
-
32 ARated permanent current Iu
-
160 ARated permanent current Iu
-
125 ARated permanent current Iu
-
100 ARated permanent current Iu
-
50 ARated permanent current Iu
-
17 ARated permanent current Iu
-
22 ARated permanent current Iu
-
26 ARated permanent current Iu
-
10 ARated permanent current Iu
-
13 ARated permanent current Iu
-
16 ARated permanent current Iu
-
0.16 ARated permanent current Iu
-
0.25 ARated permanent current Iu
-
0.4 ARated permanent current Iu
-
0.63 ARated permanent current Iu
-
20 ARated permanent current Iu
-
1 ARated permanent current Iu
-
1.6 ARated permanent current Iu
-
2.5 ARated permanent current Iu
-
4 ARated permanent current Iu
-
25 ARated permanent current Iu
-
6 ARated permanent current Iu
-
8 ARated permanent current Iu
-
250 ARated permanent current Iu
-
400 ARated permanent current Iu
-
630 ARated permanent current Iu
-
40 ARated permanent current Iu
-
80 ARated permanent current Iu
-
108 ARated permanent current Iu
-
75 ARated permanent current Iu
-
90 ARated permanent current Iu
-
24 VNominal value output voltage 1
-
12 VNominal value output voltage 1
-
5 VNominal value output voltage 1
-
63 ARated permanent current at AC-21, 400 V
-
32 ARated permanent current at AC-21, 400 V
-
100 ARated permanent current at AC-21, 400 V
-
125 ARated permanent current at AC-21, 400 V
-
160 ARated permanent current at AC-21, 400 V
-
50 ARated permanent current at AC-21, 400 V
-
16 ARated permanent current at AC-21, 400 V
-
20 ARated permanent current at AC-21, 400 V
-
25 ARated permanent current at AC-21, 400 V
-
80 ARated permanent current at AC-21, 400 V
-
Turn buttonType of control element
-
ToggleType of control element
-
Short thumb-gripType of control element
-
Rocker leverType of control element
-
Cover gripType of control element
-
3Number of poles
-
4Number of poles
-
2Number of poles
-
6Number of poles
-
9Number of poles
-
12Number of poles
-
15Number of poles
-
100 kARated short-circuit breaking capacity Icu at 400 V, AC
-
50 kARated short-circuit breaking capacity Icu at 400 V, AC
-
15 kARated short-circuit breaking capacity Icu at 400 V, AC
-
75 kARated short-circuit breaking capacity Icu at 400 V, AC
-
20 kARated short-circuit breaking capacity Icu at 400 V, AC
-
YesSuitable for distribution board
-
IP65Degree of protection (IP), front side
-
IP2XDegree of protection (IP), front side
-
IP40Degree of protection (IP), front side
-
45 mmWidth
-
17.8 mmWidth
-
68 mmWidth
-
55 mmWidth
-
70 mmWidth
-
35.6 mmWidth
-
66 mmWidth
-
109 mmWidth
-
11 mmWidth
-
17.7 mmWidth
-
17.5 mmWidth
-
9 mmWidth
-
52.5 mmWidth
-
150 mmWidth
-
60 mmWidth
-
35 mmWidth
-
140 mmWidth
-
18 mmWidth
-
27 mmWidth
-
22 mmWidth
-
94 mmHeight
-
90 mmHeight
-
94.9 mmHeight
-
165 mmHeight
-
140 mmHeight
-
83 mmHeight
-
84 mmHeight
-
25 mmHeight
-
115 mmHeight
-
93.4 mmHeight
-
220 mmHeight
-
60 mmHeight
-
84.5 mmHeight
-
50 mmHeight
-
142 mmHeight
-
52 mmHeight
-
95 mmHeight
-
51 mmHeight
-
99.6 mmDepth
-
75 mmDepth
-
67.3 mmDepth
-
73.5 mmDepth
-
53.4 mmDepth
-
171 mmDepth
-
144.6 mmDepth
-
35.6 mmDepth
-
54.5 mmDepth
-
76 mmDepth
-
72.6 mmDepth
-
118 mmDepth
-
63 mmDepth
-
71.5 mmDepth
-
66.3 mmDepth
-
55 mmDepth
-
100 mmDepth
-
67 mmDepth
-
66 mmDepth
-
96 mmDepth
-
34 mmDepth
-
53 mmDepth
-
26 mmDepth
-
IP20Degree of protection (IP)
-
IP2XDegree of protection (IP)
-
IP40Degree of protection (IP)
-
IP30Degree of protection (IP)
-
GreyColour
-
OtherColour
-
WhiteColour
-
BlackColour
-
Screwed terminalConnection type
-
Not applicableConnection type
-
NoConnected object

Vistop isolating switch 4 poles 125A with black side handle

Vistop isolating switch 3 poles 160A with black front handle

Vistop isolating switch 4 poles 160A with black front handle

Vistop isolating switch 3 poles 160A with black side handle

Vistop isolating switch 4 poles 160A with black side handle

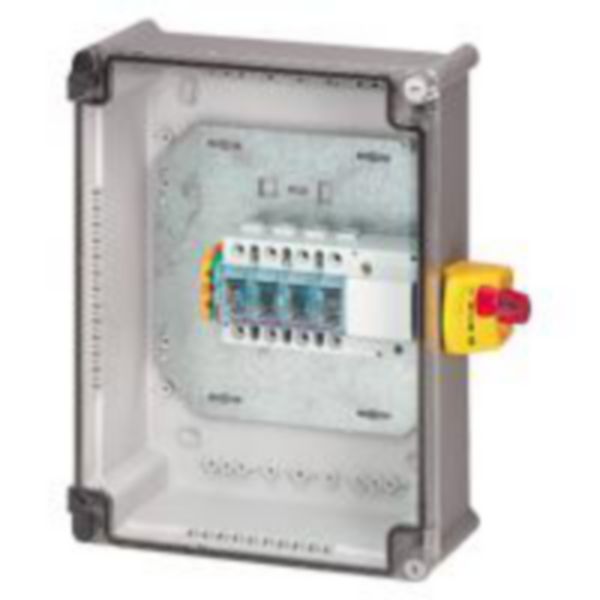
Full load switch unit with Vistop isolating switch 3P 32A

Full load switch unit with Vistop isolating switch 4P 32A

Full load switch unit with Vistop isolating switch 3P 63A

Full load switch unit with Vistop isolating switch 4P 63A

Full load switch unit with Vistop isolating switch 3P 100A

Full load switch unit with Vistop isolating switch 4P 100A
Full load switch unit with Vistop isolating switch 3P 125A

Full load switch unit with Vistop isolating switch 4P 125A
Full load switch unit with Vistop isolating switch 3P 160A

Duty label - for isolating switch padlockable faceplate - marked ''Main switch''

Auxiliary signalling contact for Vistop 63A to 160 A

Auxiliary contact for ''on/off'' signalling - for Vistop 63 to 160 A

Padlock Ø6 mm

Auxiliary contact - for isolating switch - N/C + N/O

Full load switch unit with Vistop isolating switch 4P 160A

Front external handle for Vistop 63A to 160A

Proximity switch - 3 poles - 16A

Proximity switch - 3 poles - 20A

Proximity switch - 3 poles - 25A